
Journal builds its footer from database-managed rows, columns, and modules, so the Journal 3 compatibility add-on deliberately does not try to inject anything there automatically. Here's how to place it yourself, in about a minute, using Journal's own Footer Builder.
Use this if you want the fully configurable button/card (style, size, colour, corner rounding) rather than a plain text link.
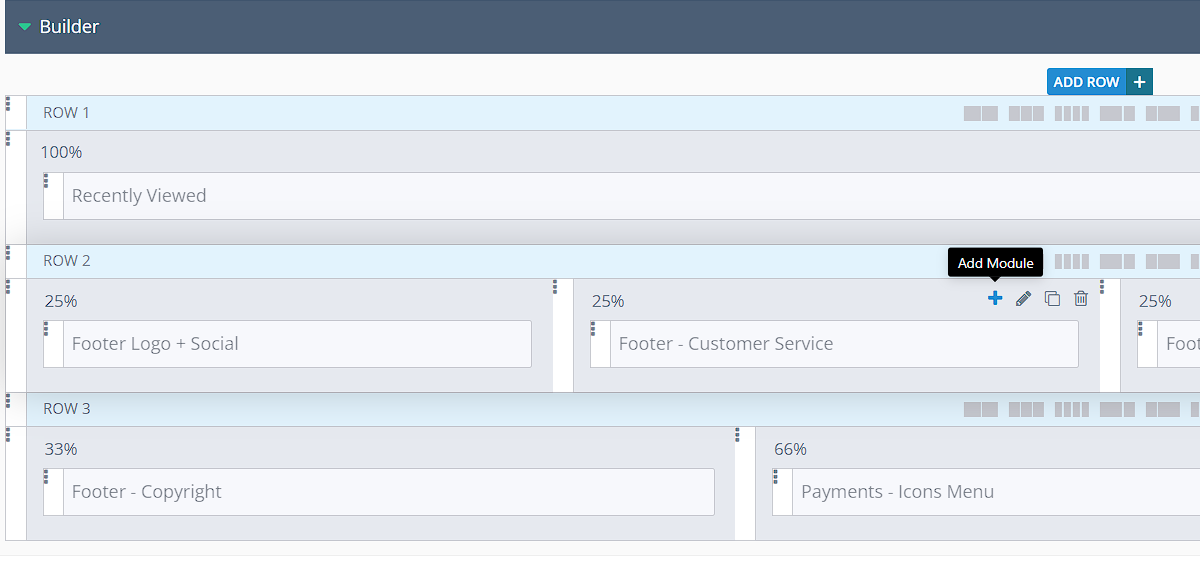
In the admin menu, go to Journal > Footer > Builder. Find the column you want
the button in — for example Footer - Customer Service — and click its blue
+ Add Module button.
In the My Modules picker, scroll the category list down to Opencart,
select it, then find Ninawebs EU Withdrawal — Button - Withdrawal Button and click it to
add it to the column. The button's own look is configured separately, under
Extensions > Extensions > Modules.
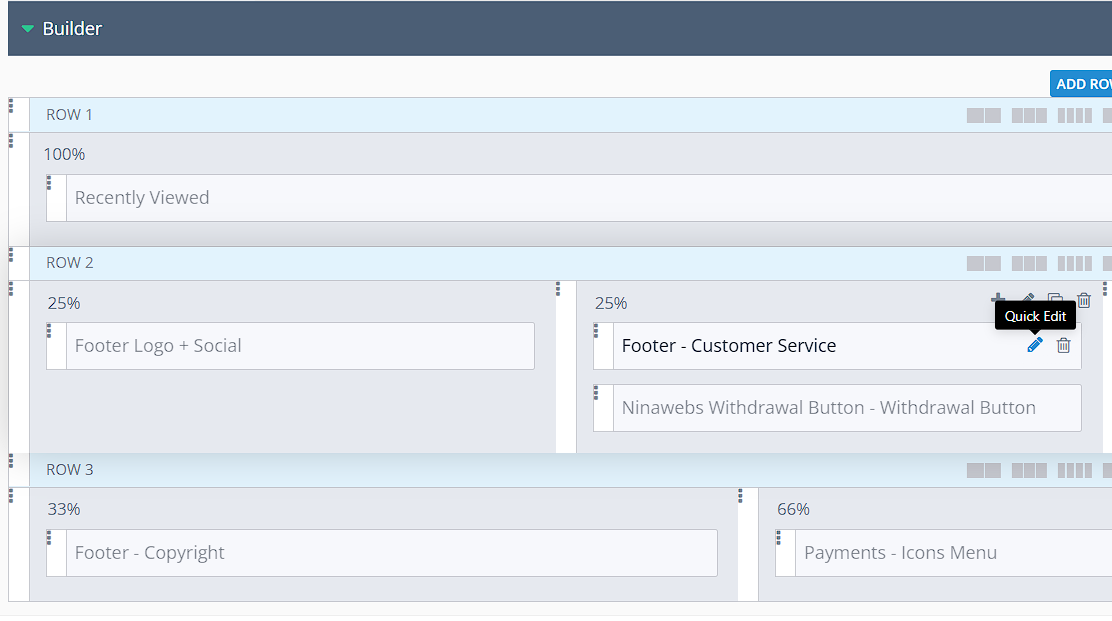
Click Save in the top right of the builder, then clear the Journal and OpenCart theme caches. The button appears immediately wherever that footer column is used.
Use this if you'd rather add a simple link (for example alongside Shipping, Returns, and Privacy) instead of the configurable button.
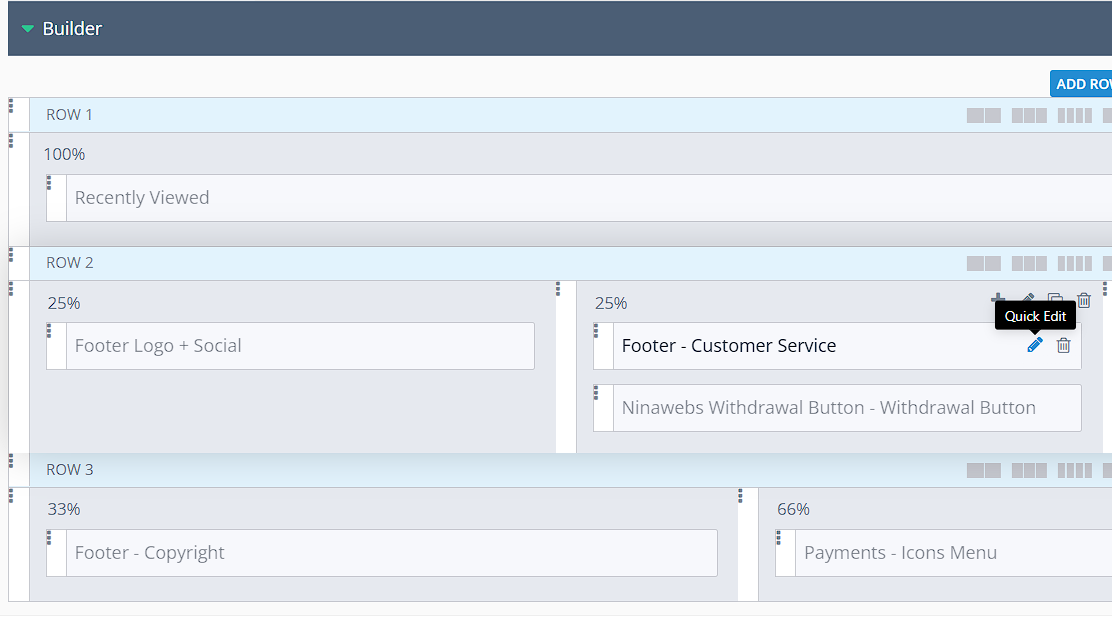
In Journal > Footer > Builder, find the menu module for the column you want
— for example Footer - Customer Service — and click its Quick Edit
pencil icon.
In Edit Links Menu, press + to add a new item, enter your translated label (for example Withdraw from Contract), then set Link to Custom and paste the public withdrawal route below into the URL field.
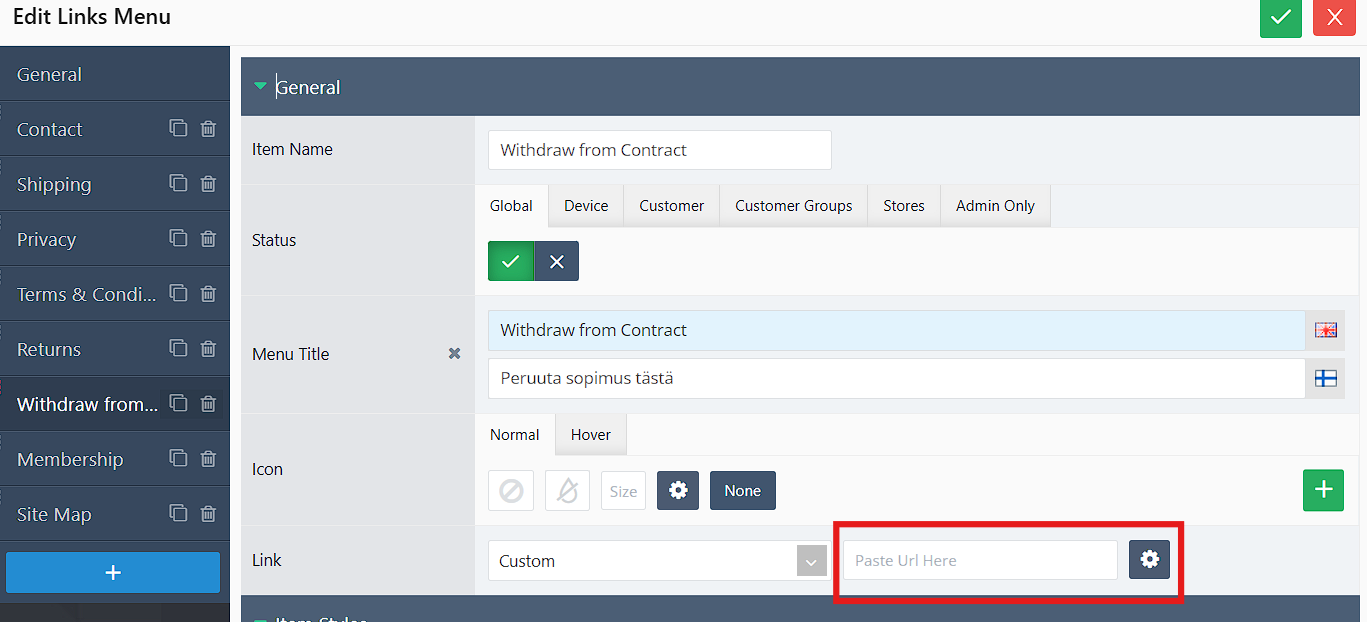
index.php?route=extension/module/nw_withdrawal_public
Save the Links Menu, then save Footer Builder, and clear the Journal and OpenCart theme caches.
Separately from this footer placement, the Journal 3 compatibility add-on's Journal Theme settings tab can add the "Cancellations and withdrawal requests" link to the customer account page automatically, for the source-verified Journal 3.1.14, 3.1.15, 3.2.8, and 3.2.10 account-page patterns. Want the button placed on the Account layout itself instead of the footer? See the Layout Builder placement guide. For the full add-on install steps, see the main documentation.